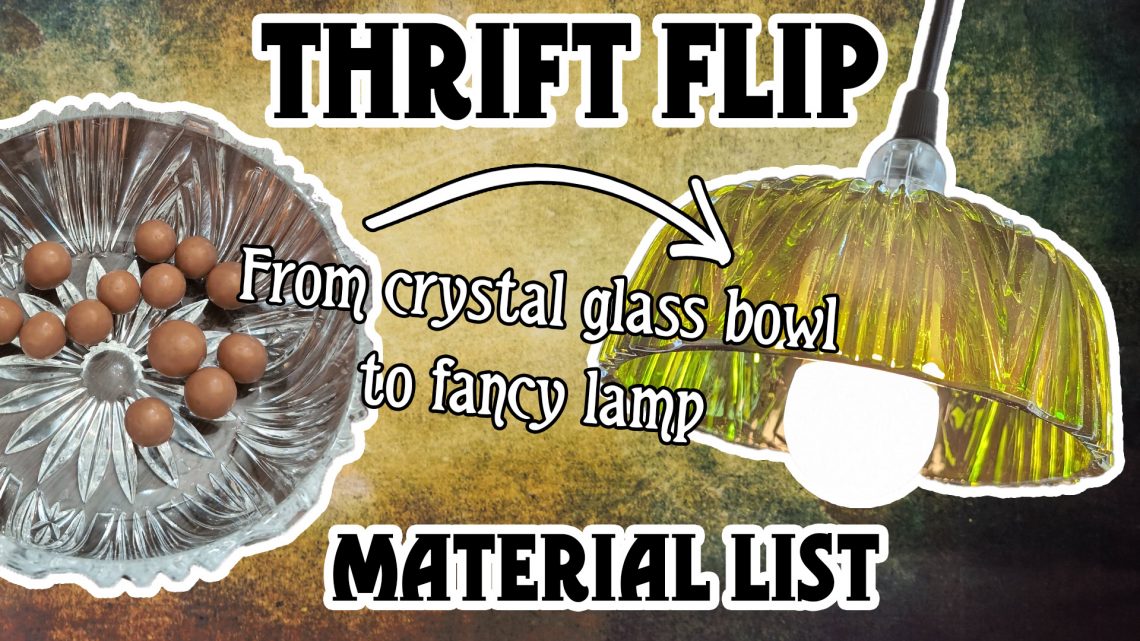
Fancy Glass Lamp from Crystal Bowls
My Home Decor- pinterest board is full of fancy glass lampshades like these ones, but the price tag was not suitable for my budget so I decided to get creative and make myself a fancy vintage style glass lamp.
Jump straight to the material list


Pinterest was again really helpful (if we don’t count the time spent looking at pretty pictures and going down the inspiration rabbit hole…) and I found some lamps made from tea cups and vases and decided to go to the thrift store and see what I could find.
Sourcing the components
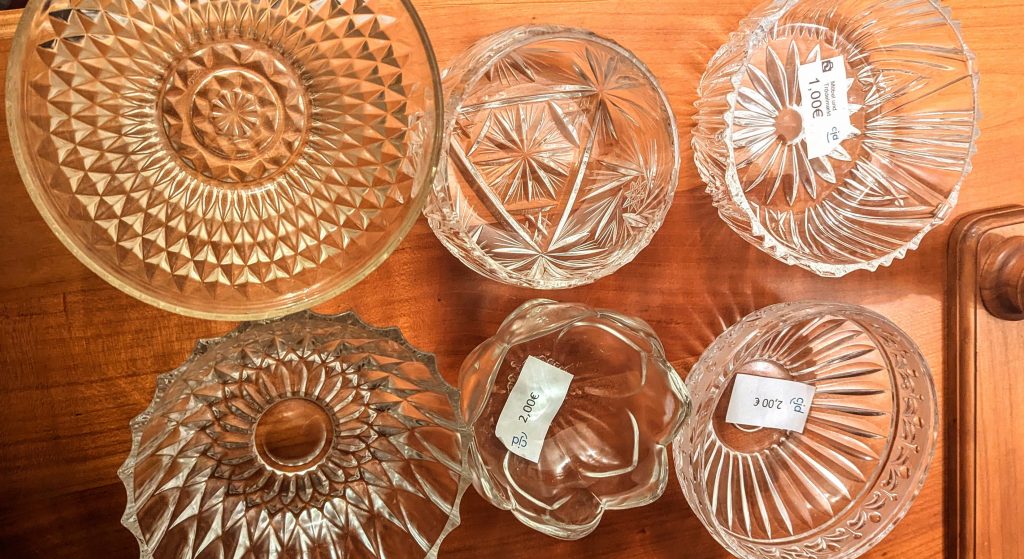
I took home a selection of glass bowls, some even in the shape of little flowers, so pretty close to my inspiration images and paid about 5€ for all of them (The shop clerk took a look at my loot and made me a really good price for all of it, ignoring most of the price tags.)
Drilling the glass was frightening but it was a lot easier than I had expected. I got a diamond drill with a centring piece* and drilled from the inside of the bowl. This made the placement a bit more difficult, but I could fill the bowl with water to cool the drill without having to change or renew it all the time. I placed the bowl onto a towel to level it and prevent it from shifting, as well as to distribute the weight and to soak up the water once I was through.
After drilling the holes I painted some of the bowls with green transparent glass paint* that can be fixed by backing it in the oven. It was a bit difficult to paint on without creating to many streaks because it is quite viscous. But the busy surface of the bowls helps conceiling them.
Because I figured that getting all of the electric components seperately would get quite expensive again, I searched Kleinanzeigen (a bit like market place or Craig’s List) for pendant luminaires and found one I could work with.
However because it was meant for edison style light bulbs the fittings didn’t have threading for lampshades. Since I wanted to use smaller E14 fittings anyway (because that also meant I could use a smaller drill), I bought eight of those and changed them.
Originally I wanted to use metal fittings because they look more vintage BUT those need a threecore cable with grounding which the pendant luminaire didn’t have so I opted for plastic fittings instead. I could use the original strain relief though, which is important if you want to hang your lamp directly from the cable!

I know that electric wiring sounds really intimidating (at least it did to me and this was also the reason I got a ready-made lamp) but I found the tutorial videos of Leuchtenbau24 really helpful in assembling my fittings. It’s still best to get a professional to install your electronics!
Assembling the glass lamp
Once I had the lamp and the bowls ready, I could assemble everything my putting the fitting though the holw in the bowl and securing it by screwing the lamp shade rings together, sandwiching the newly created lamp shade between two of the screw rings.
Five lamps now glow gloriosly above our dining table and the other three ones sit above our sofa. (To be able to operate them individually I got additional wifi smart bulbs.)


Overall I paid 71,88€ but that’s for a lamp with 8 (!) glass lamp shades instead of just one, maybe 2 for the same price.
If you have any questions about my process feel free to ask (best by messaging me on instagram).
Material list for a fancy vintage style glass lamp
I’ve put together two lists: one with the exact pieces I’ve used and an alternative amazon affiliate* list with similar components for more convenient use.
(I recommend not using the big a though, even though it would mean I get a small commission if you do so.)
What I used:
- Glass bowls – thrifted (crystal glass works best, as it’s not as hard as pressed glass) (5 €)
- Diamond drill – hsawbit 28mm with centring drill – via amazon* (6,99 €)
- Glass Paint – ideen mit herz – Premium Glasfarbe transparent oliv via amazon* (6,97 €)
- Pendant luminaire – 2nd hand via Kleinanzeigen (25 €)
- E14 fittings (I used different ones but found the transparent ones looking best) – Steckfassung E14 transparent M10x1 Teilgewindemantel / Gewindemantel ( 4,19 € / 3,98 €)
Screw ring – Schraubring E14 Unterring transparent (5 for 2,75€)
via ebay EloWell Shop Leuchtenzubehör (everything I bought was 34,91€ incl. shipping)
Overall cost: 71,88 €
* amazon affiliate link: If you use one of my affiliate links to purchase something I get a small comission fee. There are no addition costs for you.

Das könnte dich auch interessieren

List of Costuming Events

Make the 1950s Walkaway Dress actually fit